Thanks for providing that clarification! I see now what you’d like to do.
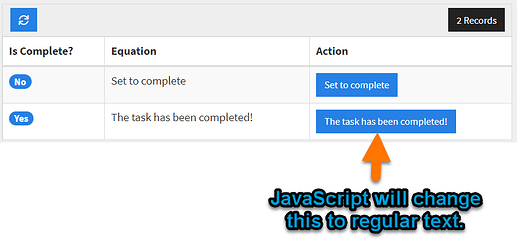
I slightly altered my equation method to accomplish what you’d like. Essentially, using the equation, we can still determine what to display. With the addition of some JavaScript, we can set up the display of the action link to appear based on what the equation value shows.
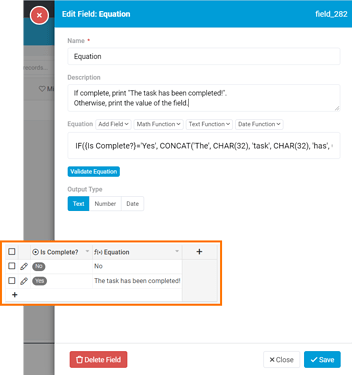
I’ll show you how to set this up. First, let’s set up the equation. We’re going to use the equation value as the display for the action link so you’ll want to set up a condition using IF to show the button text or the message that you’d like to show instead of the action link.
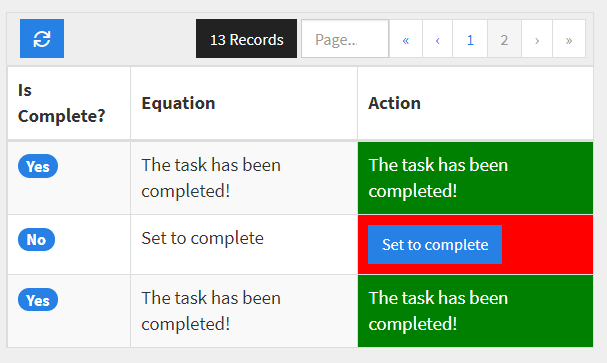
For this example, I show “Set to complete” on the action link button or “The task has been completed!” if the action link has already been clicked. You can set up your equation to show another field’s value or static values.

For reference, here’s my equation function:
IF({Is Complete?}='Yes', CONCAT('The', CHAR(32), 'task', CHAR(32), 'has', CHAR(32), 'been', CHAR(32), 'completed!'), CONCAT('Set', CHAR(32), 'to', CHAR(32), 'complete'))
Once you have your equation set up, go to the page where you have your table component. Here well set up the action link and add JavaScript to the page.
First, let’s make sure the action link is configured accordingly. Open up the link in your table component to edit it.
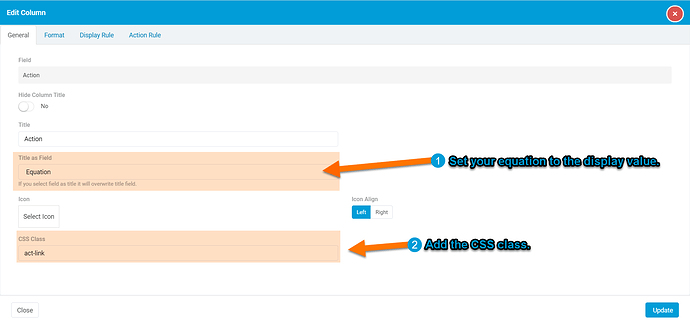
- Set up your equation as the display value of the action link. This way, the action link will display the button text or the other value accordingly.
- Add a CSS class to your action link. This will be referenced in the JavaScript so be sure that it matches my example “act-link” or be sure to remember this value so you can change the JavaScript in the next step.
After this, you’ll be able to see that your equation value displays as links on the page side. Now, we’ll add JavaScript to update the value that does not need to be a link to display as regular text on the page.
Here’s the JavaScript code that you’ll be adding to the JavaScript tab of your page:
TB.render('component_id', function(data) {
    var links = document.getElementsByClassName('act-link'),i = 1, temp, text, removeThis;
    var numLinks = links.length;
    while(i<numLinks){
        removeThis = links[i].getElementsByTagName("a")[0];
        removeThis.setAttribute("onClick", "window.location.reload();");
        text = removeThis.innerHTML;
        if(!text.contains("Set to complete")){
            removeThis.remove();
            temp = document.createElement('span');
            temp.innerHTML = text;
            links[i].appendChild(temp);
        }
        i++;
    }
});
Before testing out the final result, you will want to make an update to the JavaScript code above. Be sure that you update the “component_id” to your table’s component ID. Additionally, if you set your own custom CSS class for the action link in the previous step, please change “act-link” in the code accordingly.
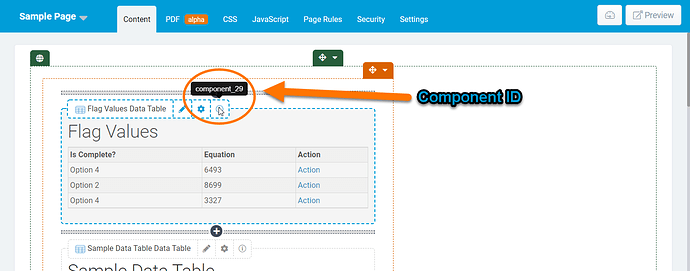
For reference, you may find the component ID in the page builder by hovering over the info icon.
After you’ve updated the JavaScript, you’ll be able to test out the changes on your page.
Hope this provides a solution for what you’ve been looking for. Let me know if you have any additional questions! 
