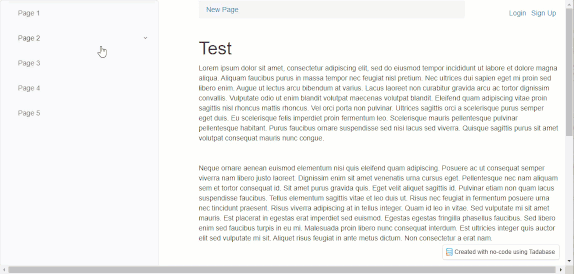
In the post, I’ll share some CSS and JavaScript code you can use to turn your Tadabase Vertical menu into a full-height menu with the options being 'on click vs. ‘on hover’ as shown in the GIF below.
Step 1
Add the Layout that includes a vertical menu, as shown in the image below.
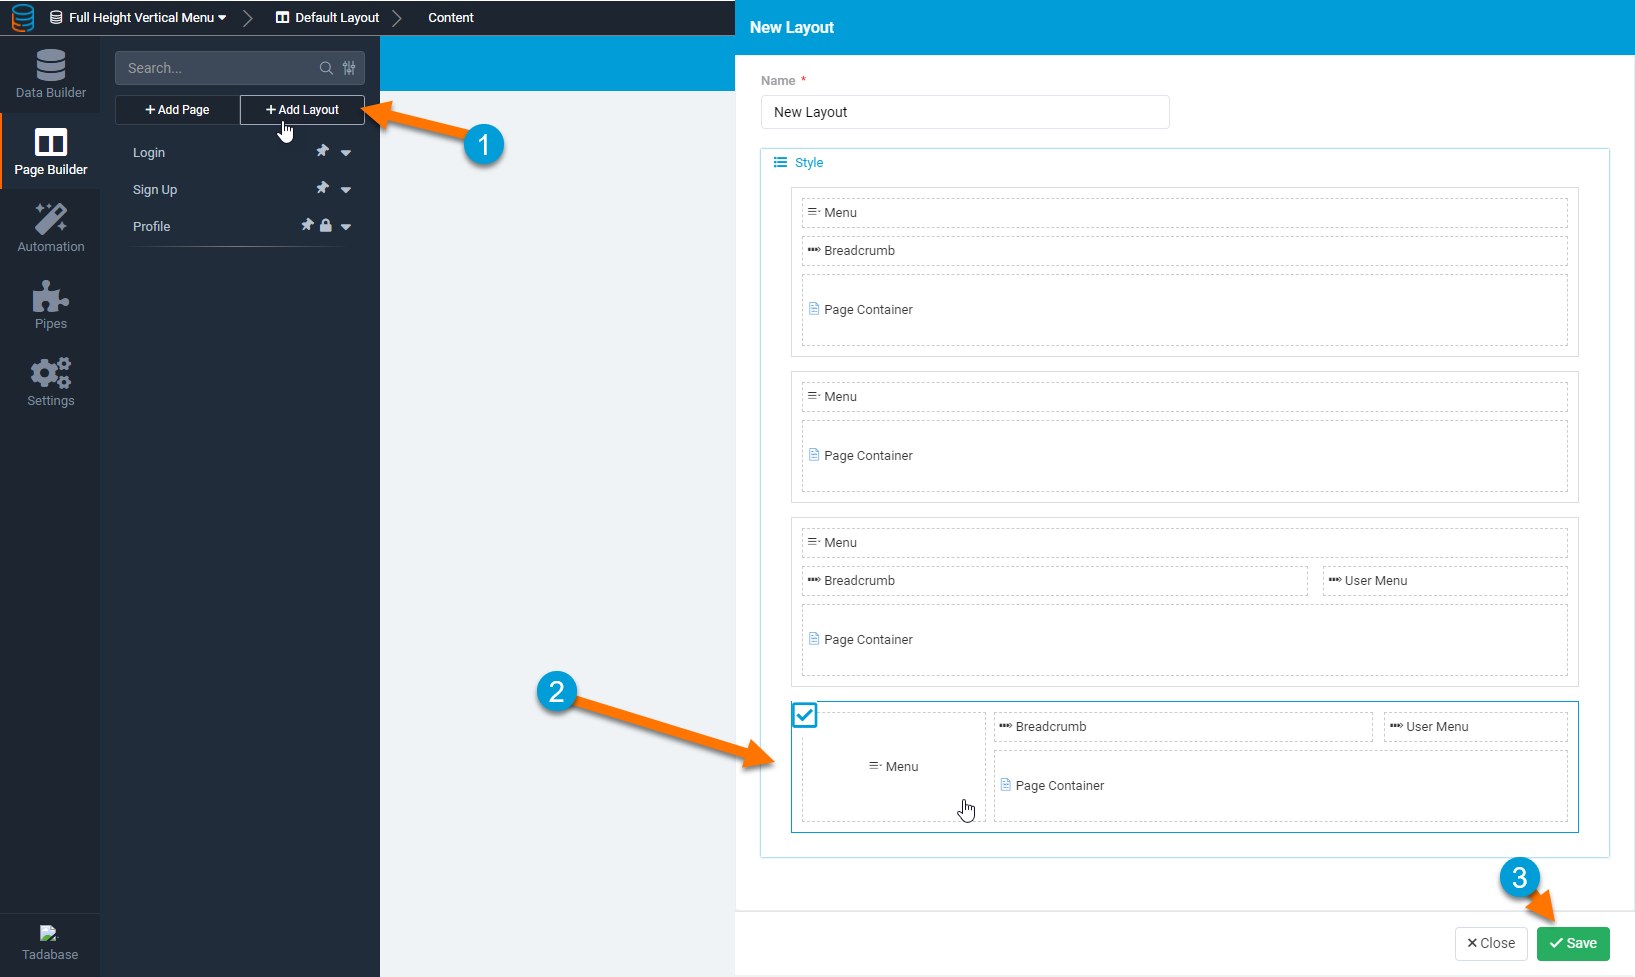
Please note that this layout setup has a known issue where adding Rows/Columns will override the Page Container. Until our team fixes this permanently, you can fix this issue by dragging the page container outside of the column it’s contained in, as shown in this video: 05.14.2021-07.59.37.
Step 2
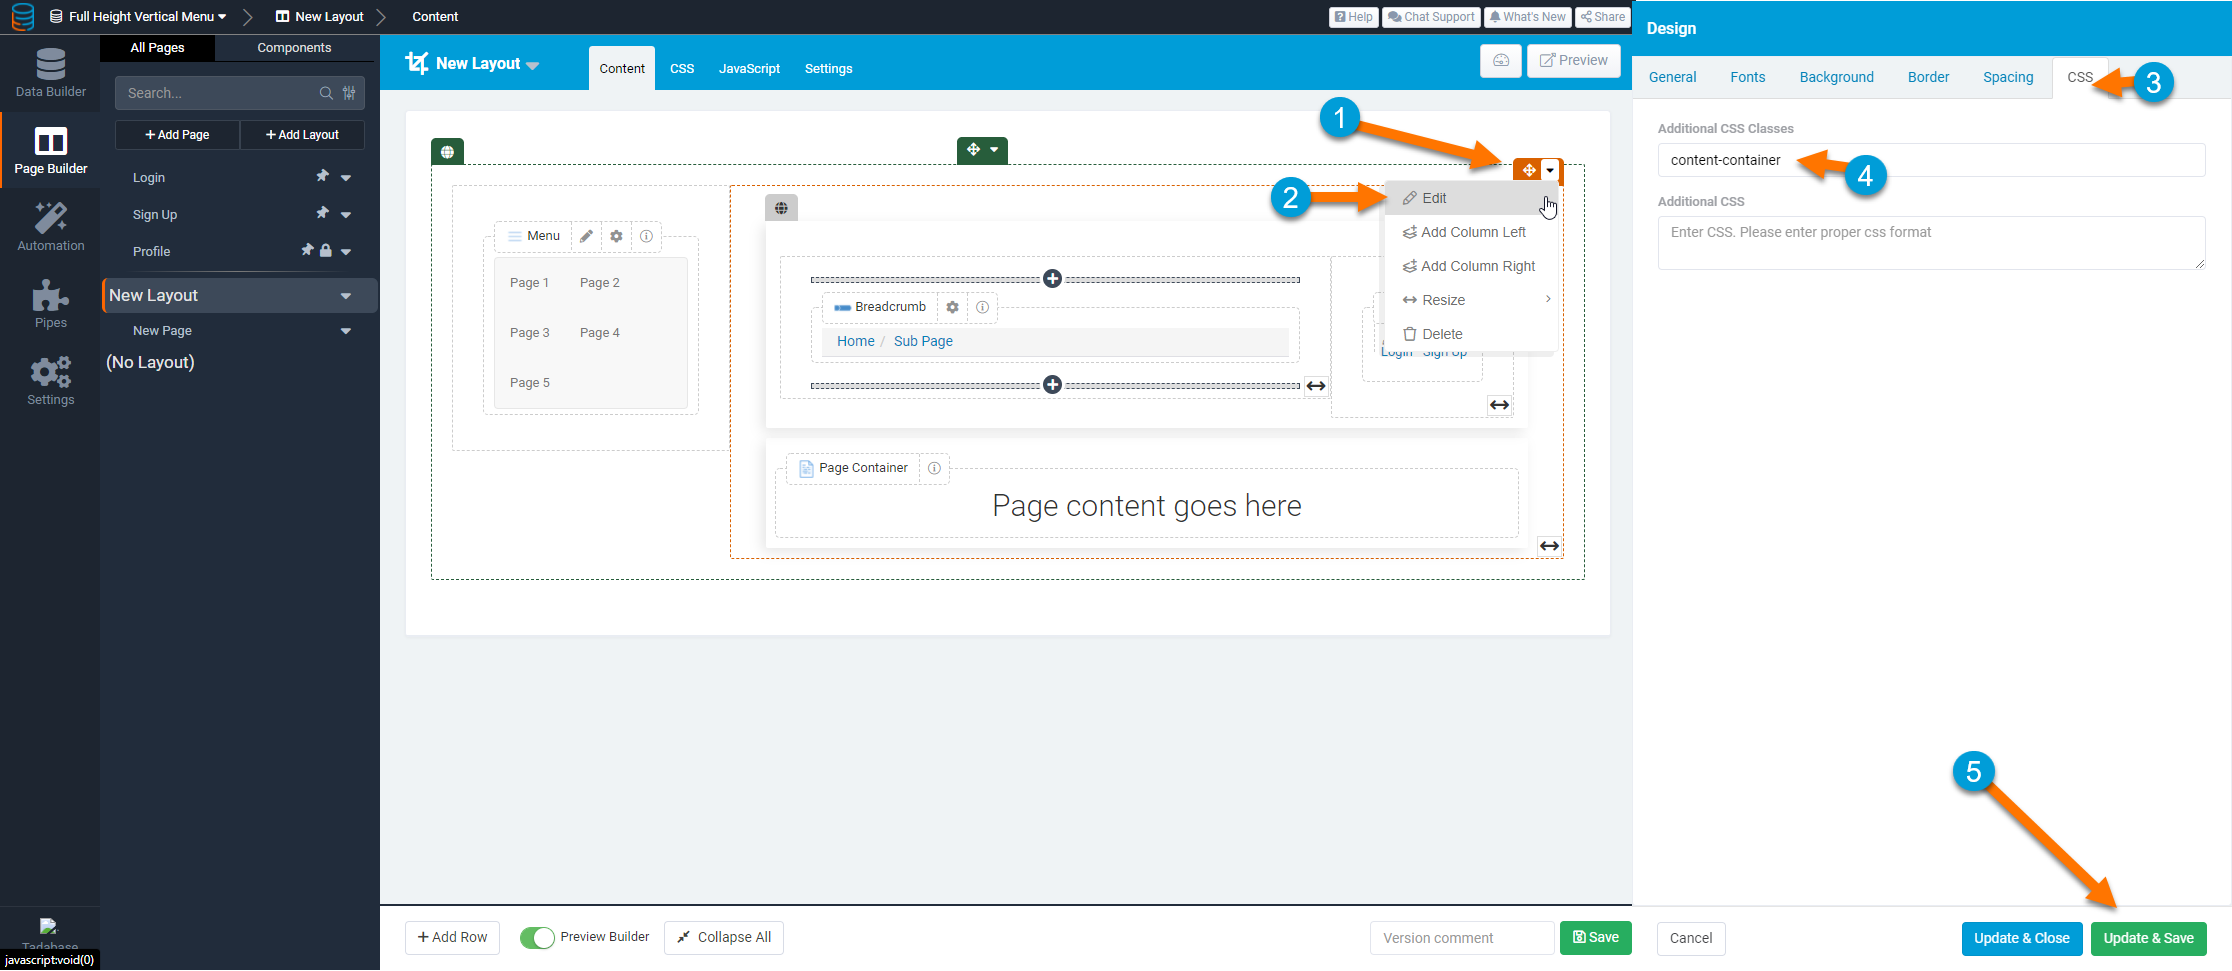
Add the class ‘content-container’ to the Additional CSS Classes setting for the column that contains the Page Container and any other content you would like to add.
Step 3
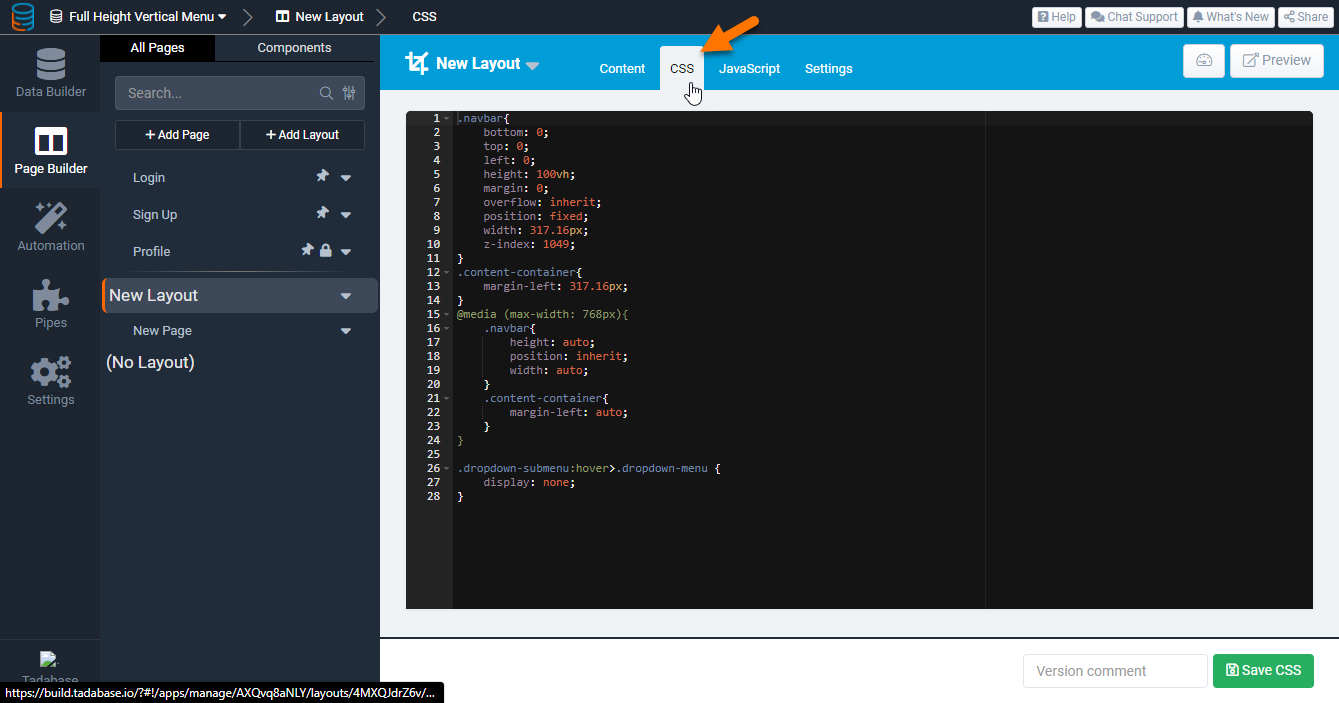
Add the following code to the CSS of the Layout.
.navbar{
    bottom: 0;
    top: 0;
    left: 0;
    height: 100vh;
    margin: 0;
    overflow: inherit;
    position: fixed;
    width: 317.16px;
    z-index: 1049;
}
.content-container{
    margin-left: 317.16px;
}
@media (max-width: 768px){
    .navbar{
        height: auto;
        position: inherit;
        width: auto;
    }
    .content-container{
        margin-left: auto;
    }
}

.dropdown-submenu:hover>.dropdown-menu {
    display: none;
}
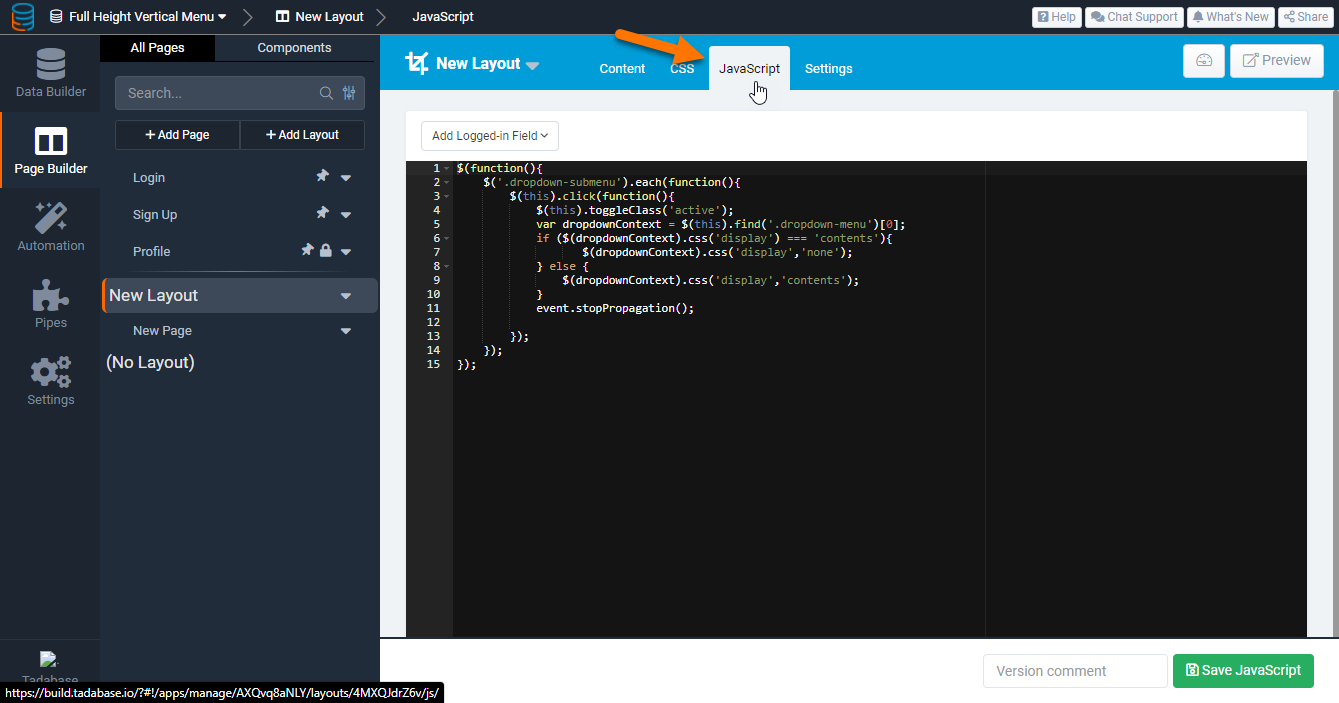
Step 4
Add the following code to the JavaScript section of the layout.
$(function(){
    $('.dropdown-submenu').each(function(){
        $(this).click(function(){
            $(this).toggleClass('active');
            var dropdownContext = $(this).find('.dropdown-menu')[0];
            if ($(dropdownContext).css('display') === 'contents'){
                   $(dropdownContext).css('display','none');
            } else {
                $(dropdownContext).css('display','contents');
            }
            event.stopPropagation();

        });
    });
});