Howdy all:
I am looking for an option to look up the previous names in a table before adding a new one. How would one go about adding/attaching a previously entered name to a new record?
Thanks much,
~Adam
Howdy all:
I am looking for an option to look up the previous names in a table before adding a new one. How would one go about adding/attaching a previously entered name to a new record?
Thanks much,
~Adam
Hi Adam,
Check out this:

You could set a validation rule to check the “Unique” ness of the name, and it will throw an error if the name exists already.
Thanks Bevcom…this could possible work for the lookup feature but attaching a previous entry to a new records doesn’t seem possible under the current design of Tadabase.
Hey @SafetyUniversity. I came up with a method that you might be able to utilize. Let me share the setup and you can see if it’ll help you out.
This method involves a connection to the same table. We won’t actually end up populating this field once the record is finally saved so there won’t be any connected values in the table.
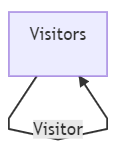
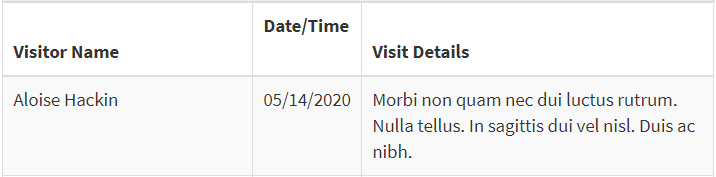
I’ll use an example I created to show this method. The example involved my Visitors table which is meant to hold the name, date/time, and description for each recorded visit.
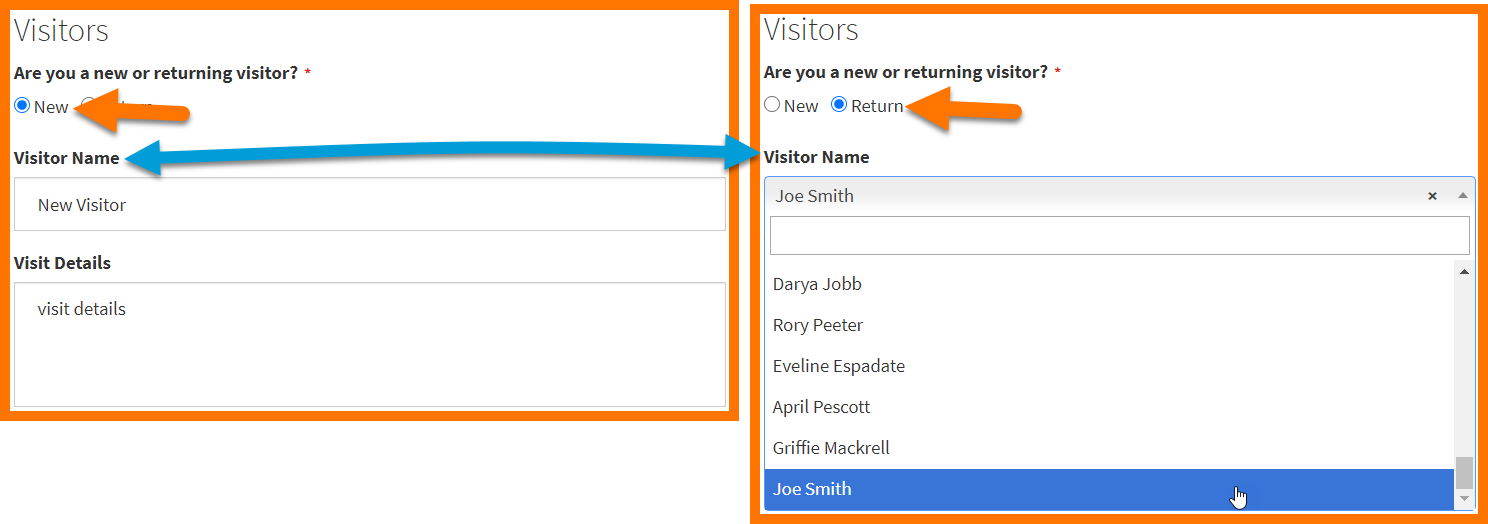
The idea is for the user to be able to fill out the form manually for a new visitor or to fill the form out automatically through selecting the visitor’s previously added record. Pictured below, the form on the left is for a new user where the Visitor Name is added manually and the form on the right shows the connection dropdown to select from the list of previous visitors.
Here is a snippet of my data structure. In this example, I set the Visitor Name based on the previous visitor record, if it exists. We’ll utilize the Visitor Connection field and Type field within form rules for this method. Date/Time and Visit Details are not needed in building out this functionality.
Let’s take a closer look at how I set up my form. This is where all the logic is built out (no other components, pages, or conditional table rules needed).
On my form layout, I have all my form fields added, except for Date/Time (I set this automatically through record rules). All fields are left with default configurations, except for one filter option added to the Visitor Name field. I added this filter to ensure no duplicate names are listed by only allowing the first record made for that visitor.
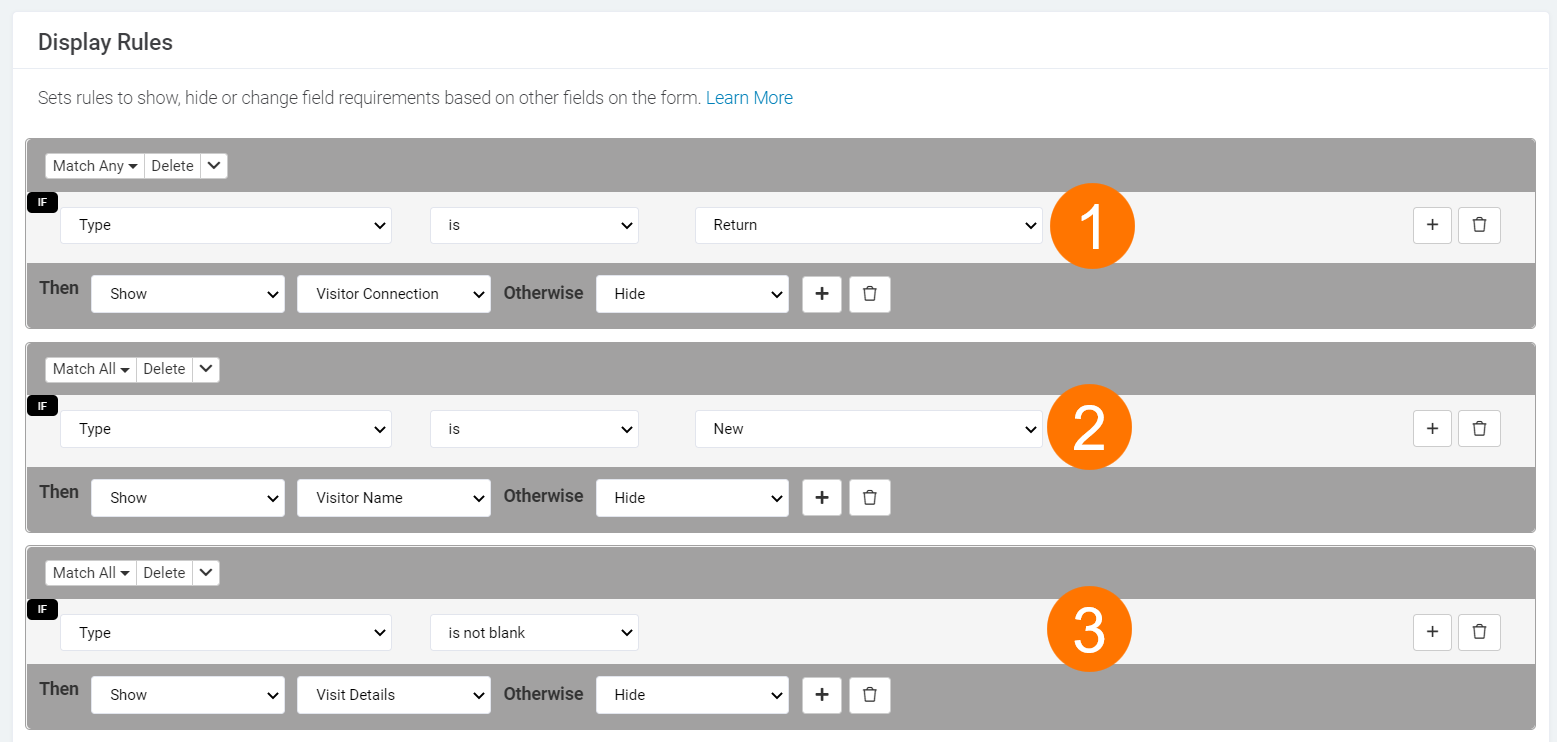
Next, let’s look at the rules I set up starting with display rules.
Pictured below are the three display rules I have set up for this example. I’ll describe each below.
Next, let’s take a look at the validation rule I created. I did not alter the default submit rule for this solution.
The rule that a user cannot submit a returning visitor as a new one. The Visitor Name that is manually entered must be unique.
For the second condition checking whether the Visitor Connection is blank, this ensures that a user can submit the form if they first entered a returning visitor’s name, then fix their form to select the name.
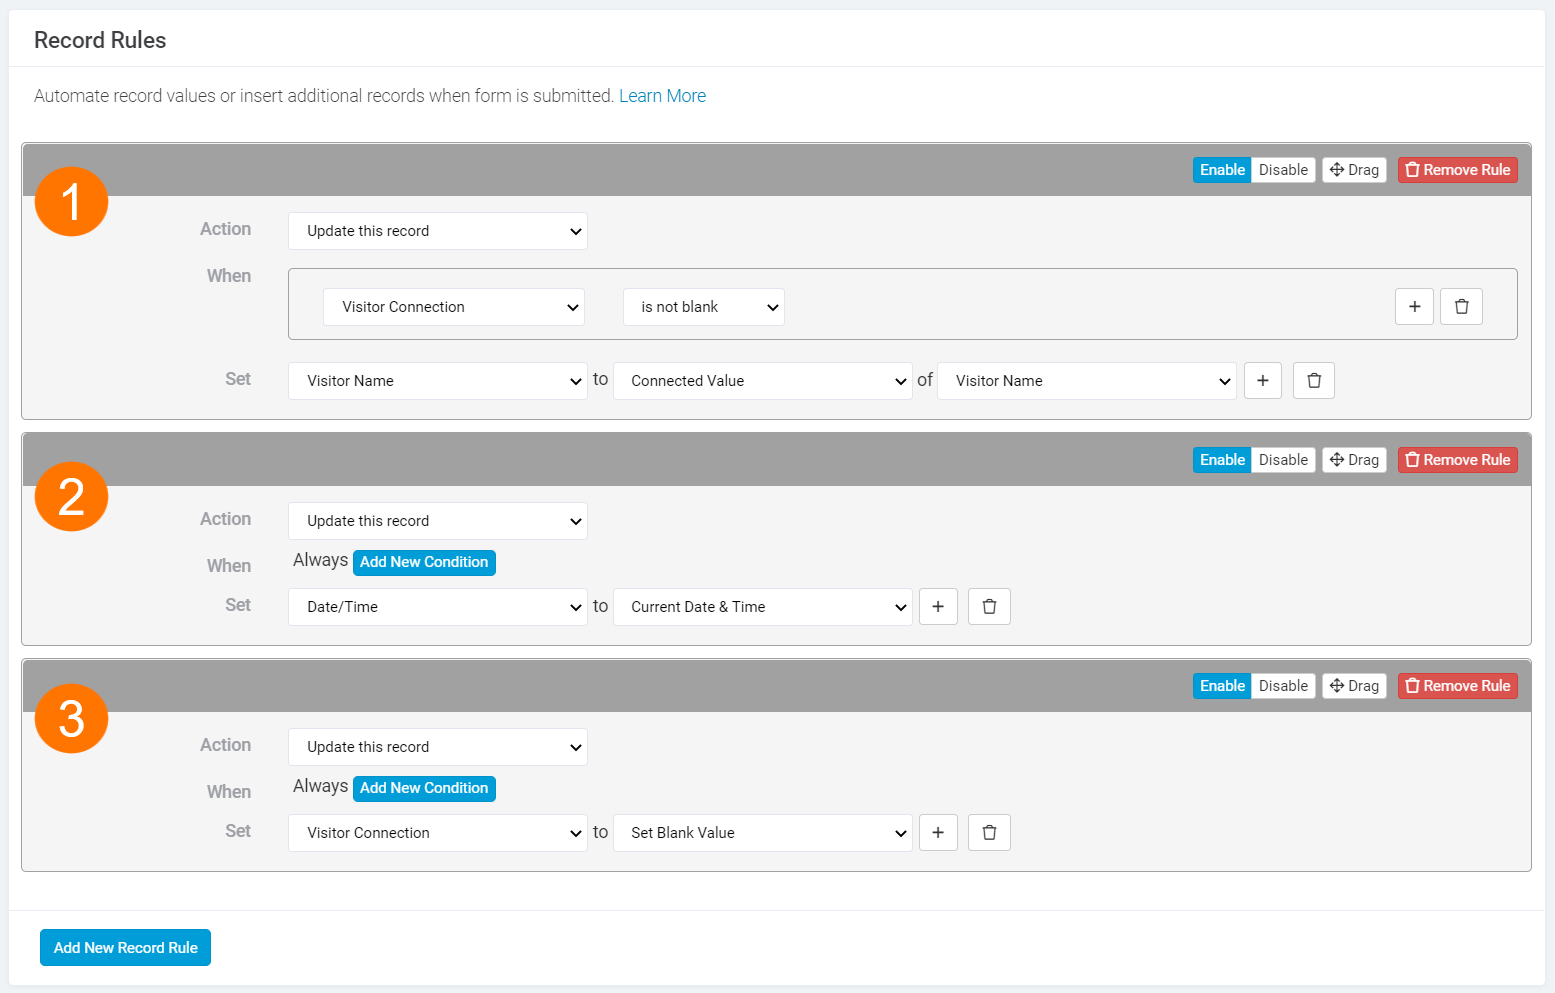
Lastly, let’s take a look at the record rules I set up. I’ll describe each within the picture below.
Everything else on my form is left in the default state.
With my table and form all set up, this is how my process looks when adding a new visitor and then adding a return visit.
Lee- A great option. I worked with Moe and came up with this solution that was just what I was looking for.
Example Case Scenario: Security Officer Incident Report
An incident can have multiple people associated with it. Additionally, multiple incidents can have the same person associated with it. To eliminate duplicative records/entry time of the same person the following steps will eliminate issues.
Tables to be created:
A “connector” table between the Incident report table (holds fields like date, time, location, etc.) and your table that holds all of the People fields. Example name: “Person-Incident Connector”
In the Incident Report Details page add a Table Data Component using the “Person-Incident Connector”.
This will create an “Add people” page. In the “Add” page complete the following:
Now, preview your updated Incident Details page and it should show the “People” table. The table should have an “Add” button to add a person to that Table Data Component.
When you open up the “Add” popup page you will see the one “connected” field that says “Select any”. This will list all persons already in the People table. Type any name you want to confirm if it is already entered. If nothing results from the search, you can click the “+” to ADD a new person (this will add it to the People table).
Fill in the “Add New Record” popup of the person. Click “Save”; this will close the popup and insert the name into the first popup page. Click “Save” again to insert the record into the Incident Details’ People table.
Bingo, there you have it. An easy way to search for previous records and insert into another area of your application while being allowed to insert a totally new record if one doesn’t exist.
See video for an instructions/example - https://youtu.be/toz3HO_qKTo
Hope this helps
~Adam
Awesome! Thanks for sharing those details here. I’m glad you were able to develop a method that works for your app.