Here’s how you can do this using some custom JavaScript.
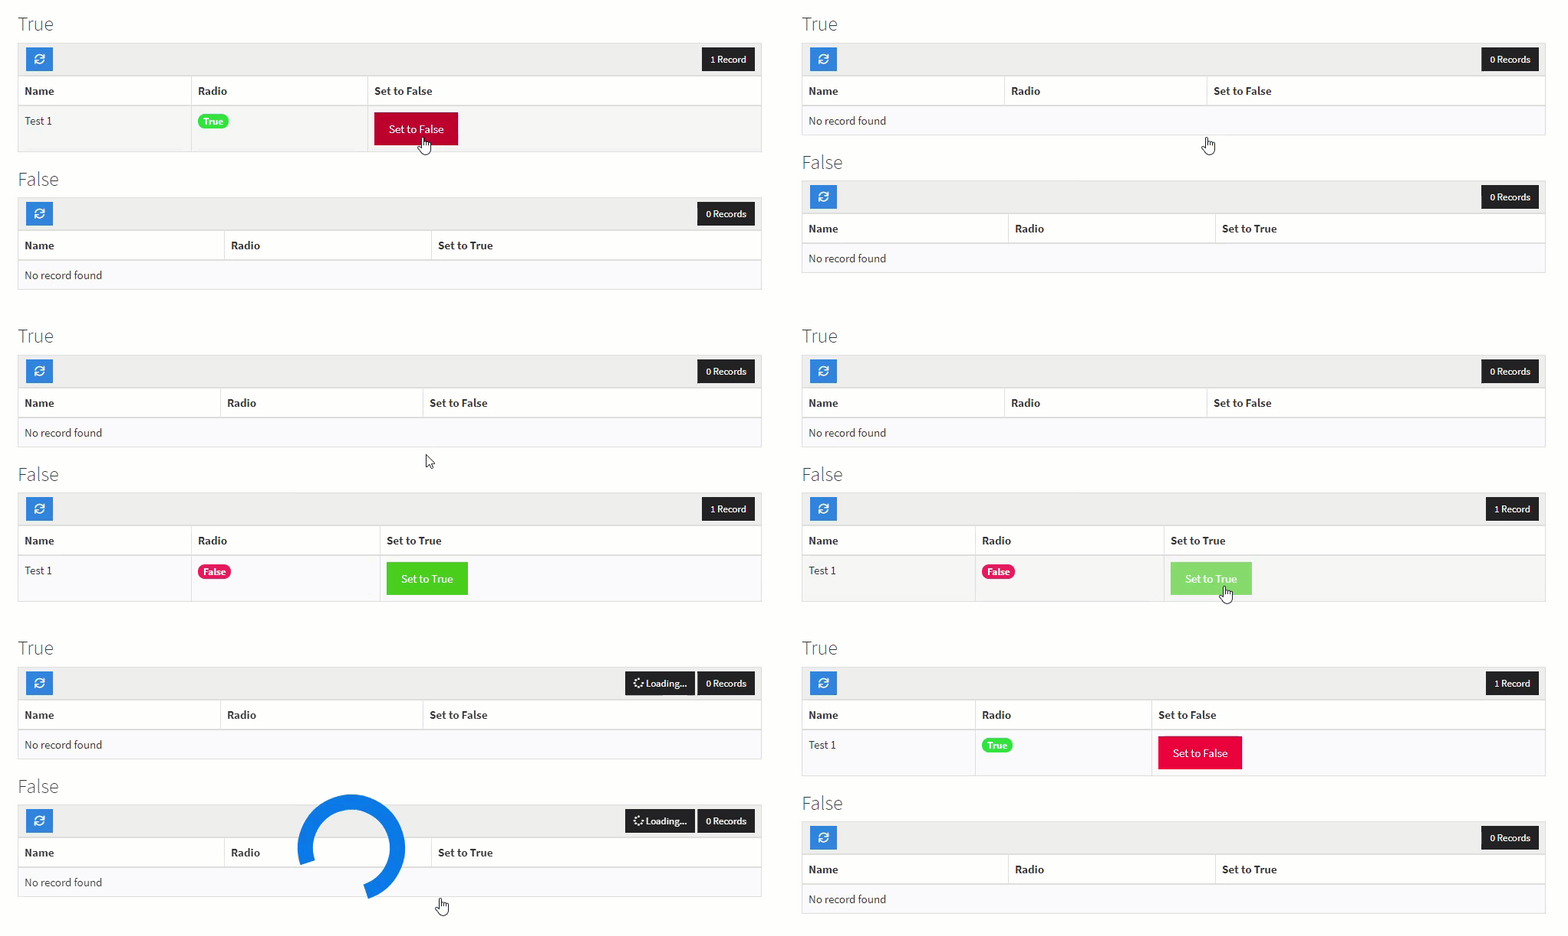
Here’s how the end result looks.

Step 1
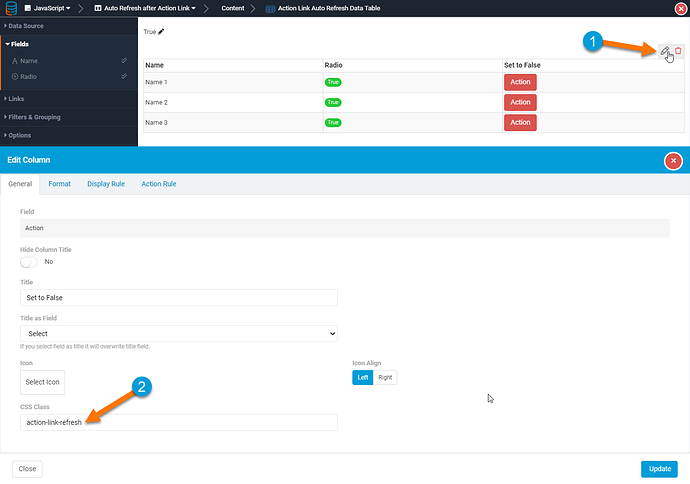
Add the CSS Class action-link-refresh to the action link column(s) as shown in the image below.
Please Note: You will need to add this to both action links if you want it to work both ways as shown in the example above.
Step 2
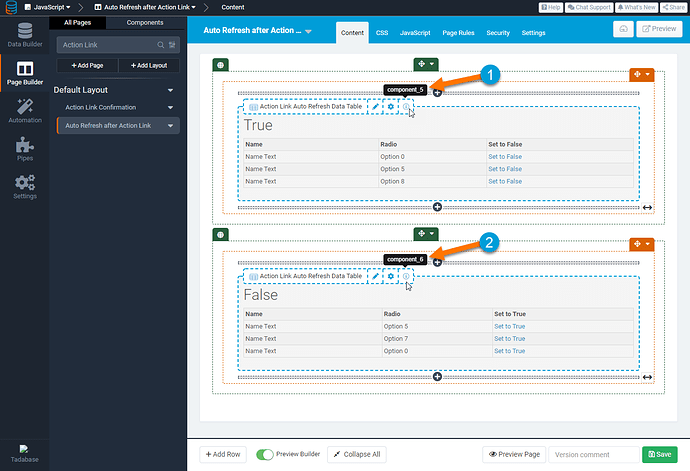
Find the Component IDs for both tables as shown in the image below.
You will need these for the next and last step!
Step 3
Finally, copy and paste the following code into the JavaScript section of your page.
var timeToWaitBeforeRefreshTriggers = 600; // Set this to the amount of time it takes for the action link to complete (milliseconds)
var tableOneId = 'component_X1'; // Change this to the first table ID
var tableTwoId = 'component_X2'; // Change this to the second table ID

var setOnClick = function(){
    $('.x-type-data-table').find('.action-link-refresh a').click(function(){
        setTimeout(function(){
            $('[ng-click="refreshData()"]').click();
        },timeToWaitBeforeRefreshTriggers);
    });
};
TB.render(tableOneId,function(){
    setOnClick();
});
TB.render(tableTwoId,function(){
    setOnClick();
});
$('body').click(function(){ // Reset after any action that can wipe the onclick event occurs by using body onclick
    setTimeout(function(){
        $('tbody tr').find('.action-link-refresh a').off();
        setOnClick();
    },800);
});
Please remember to change component_X1 and component_X2 in the code, to the component IDs from step 2.

