Finding the specific element to update

We’ve gotten many questions on support recently on how find and edit very specific CSS.

Here’s the approach I use and find it very efficient.

  1. Right click on the page and press Inspect, or Ctrl + Shift + I

  2. Press this button (or Ctrl + Shift + C) to open the selector:

  3. Next click on the exact element you wish to change:

  4. Right click on that element > Copy > Copy Selector:

  5. Paste the copied valued into the CSS tab then add { your custom css code }

If you have any other helpful tips, we’d love to hear them.

2 Likes

@moe Looks like I’m not the only one burning the midnight oil. :sleeping:

Great tip. You can skip the first step and go straight to Ctrl + Shift + C

I saw that in this video:

3 Likes

Just throwing this out there as another tool to help.

5 Likes

That is indeed an awesome extension! Just purchased and already started using it. Love it. Thanks for sharing

I read Moe’s excellent instructions. Also purchased the CSSScan utility that Tim recommended in this thread. I can figure out the CSS code (I think). My problem seems to be that, even with the help of CSSSCan, I cannot figure out what selector I should apply styles to. Now spent a couple of hours banging on this problem and don’t seem to be getting anywhere.

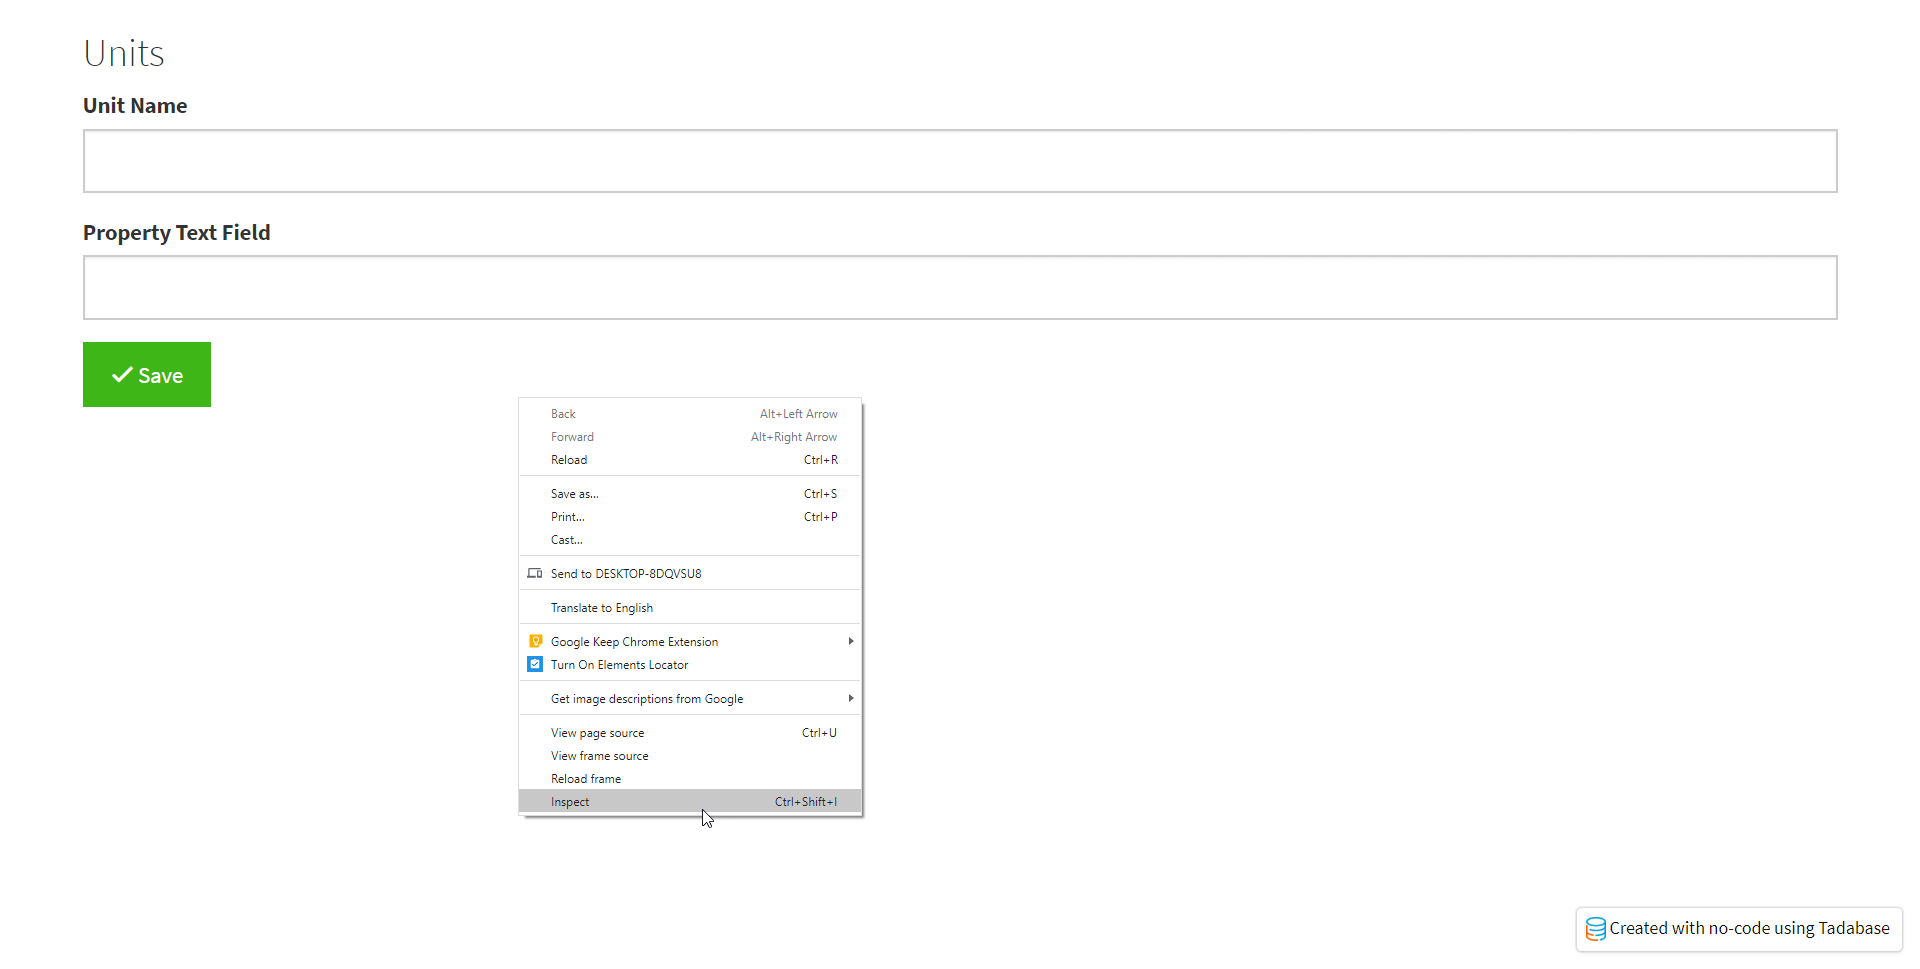
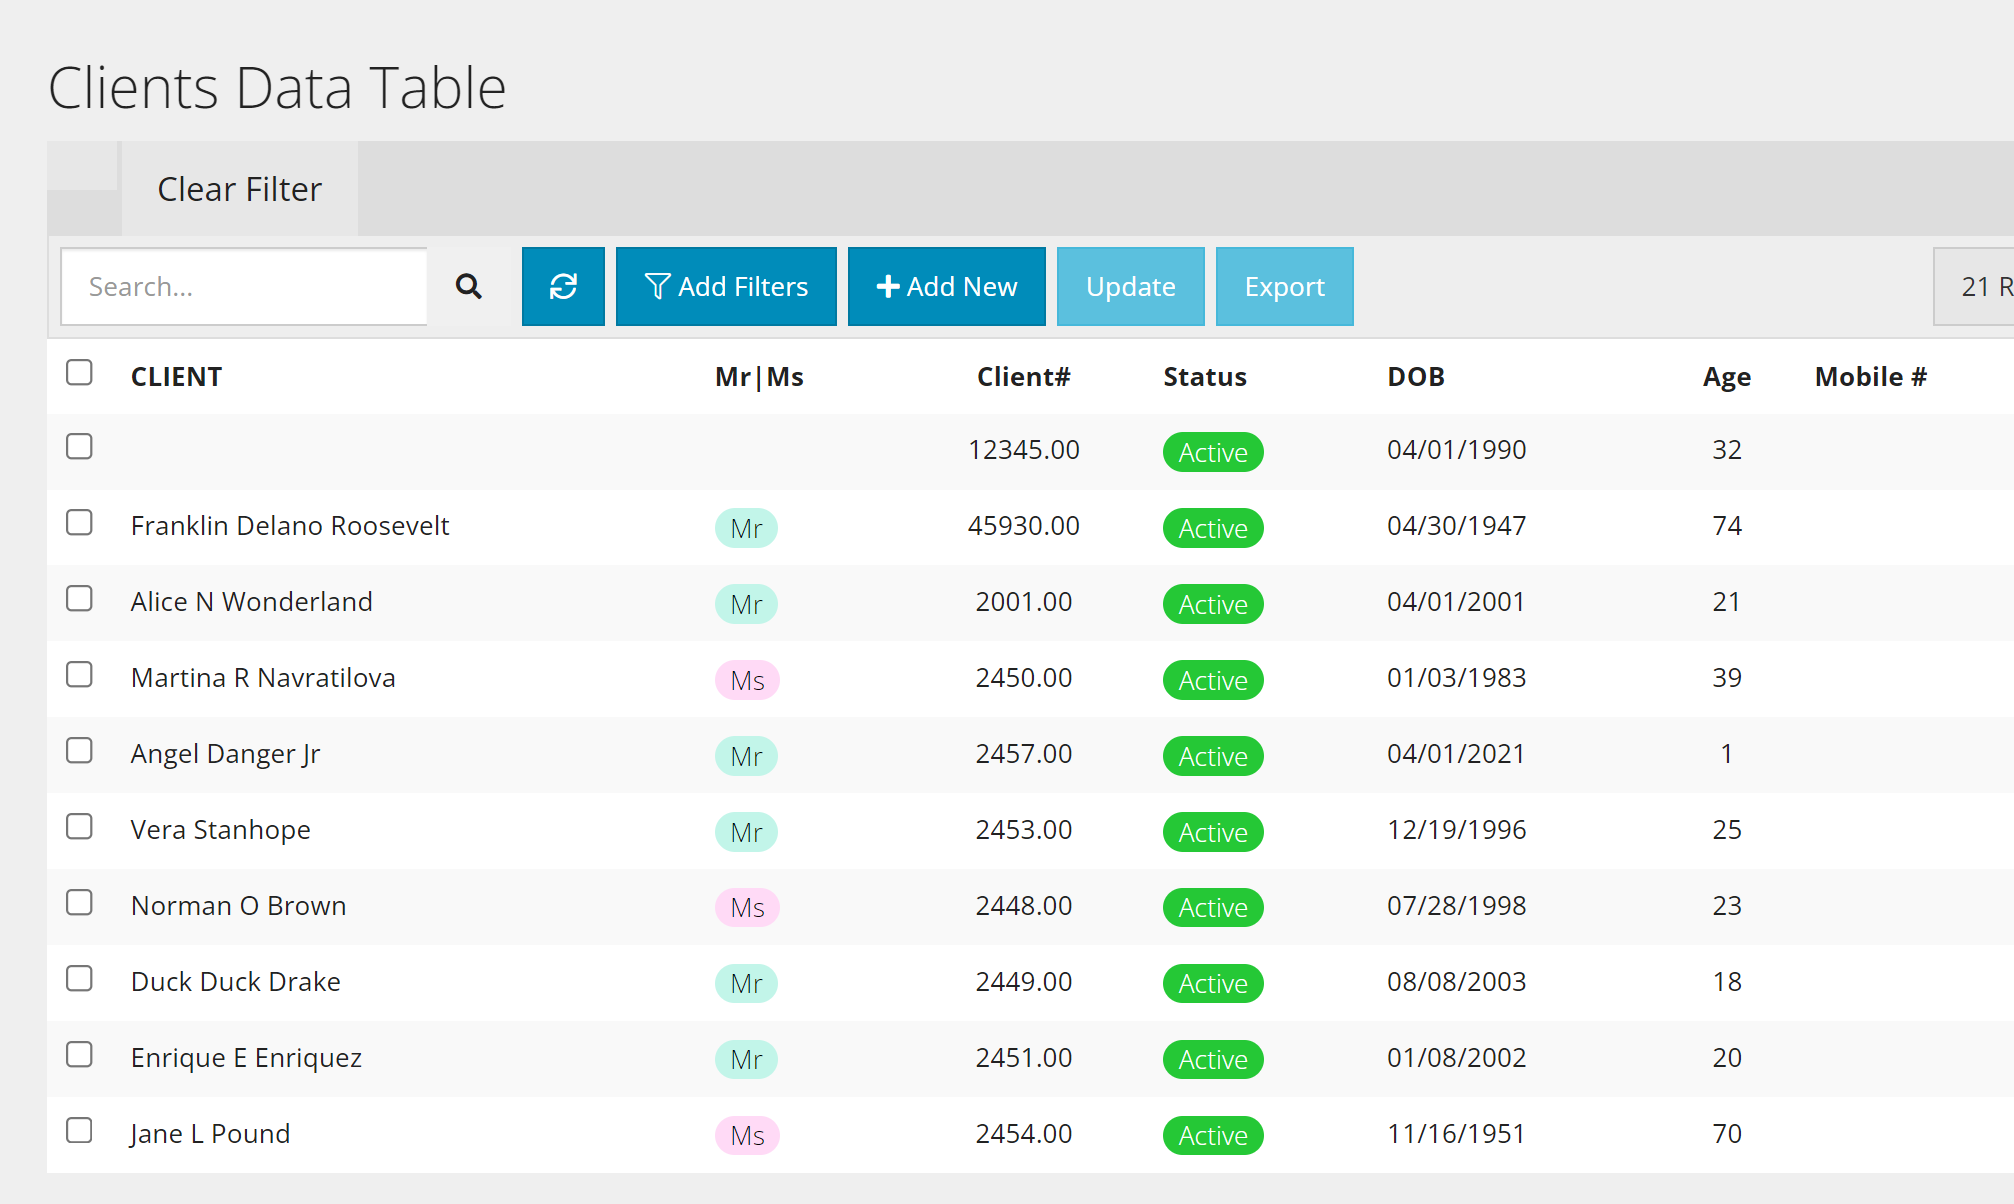
All I want to do is remove the vertical divider/separator lines between columns in a table. I’ve tried editing the CSS for the page repeatedly using different selectors and different CSS and no matter what I do, it seems to make no effect on the table as rendered.

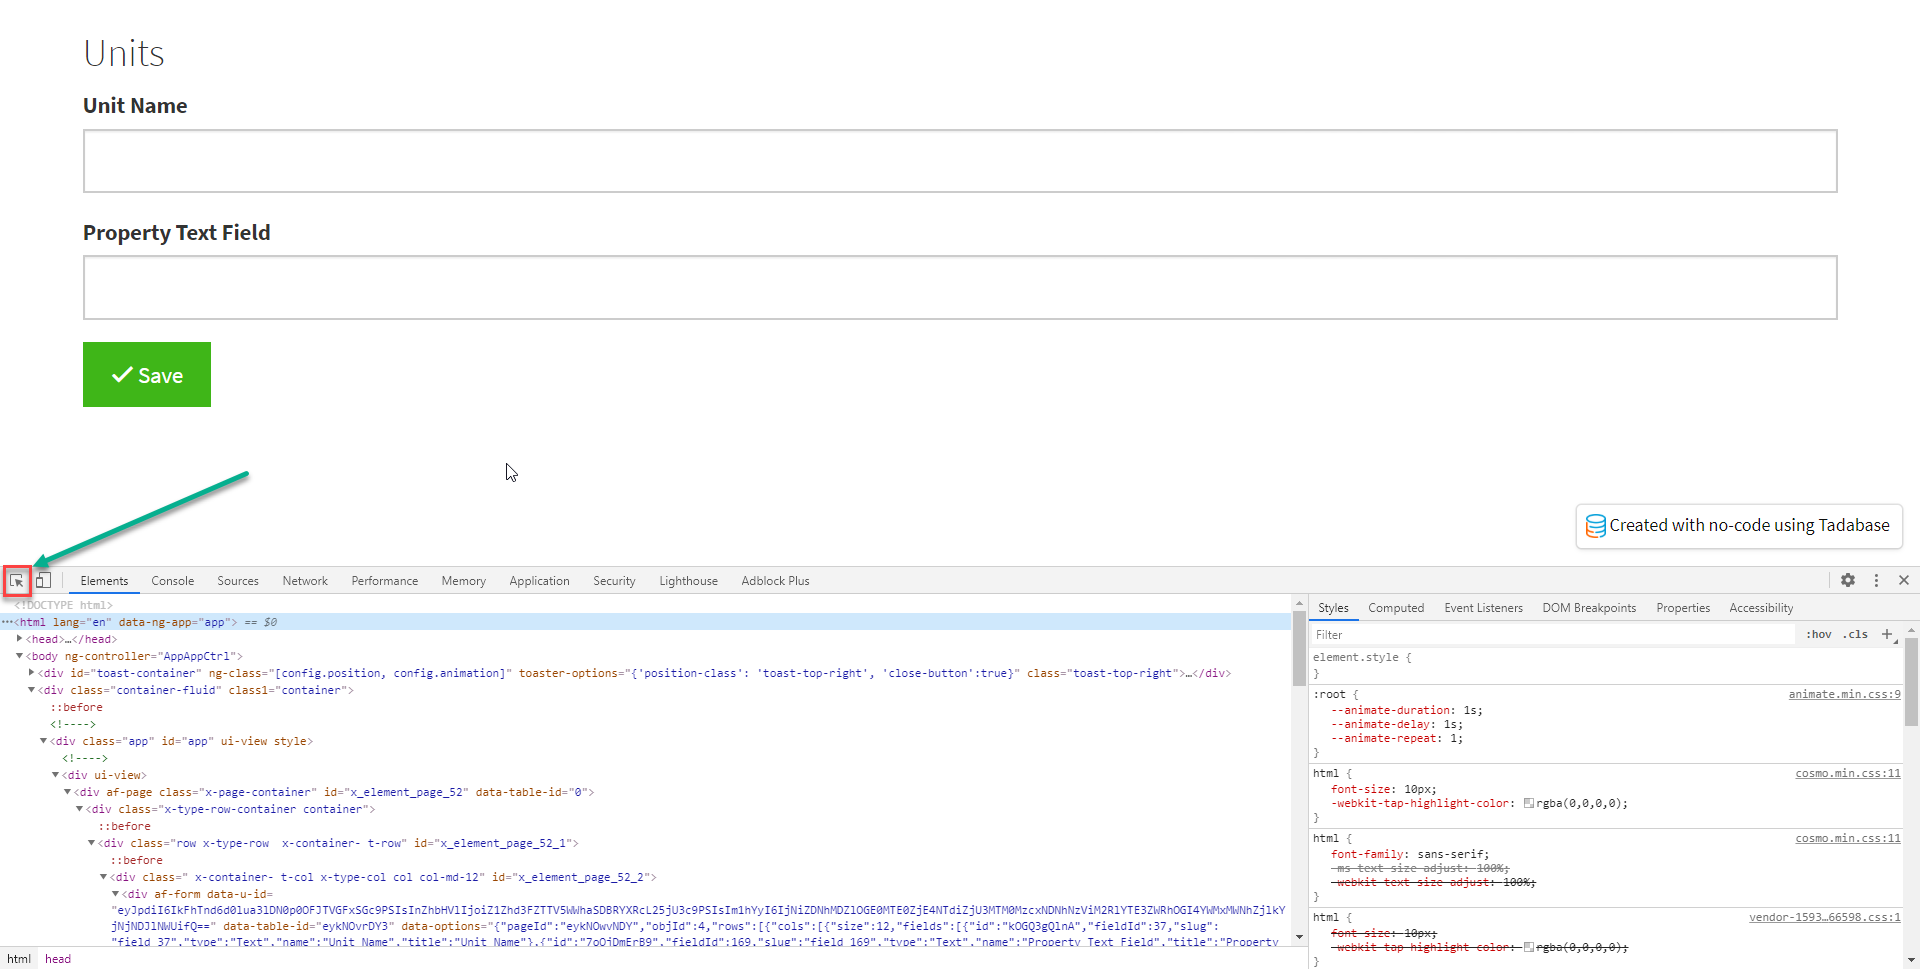
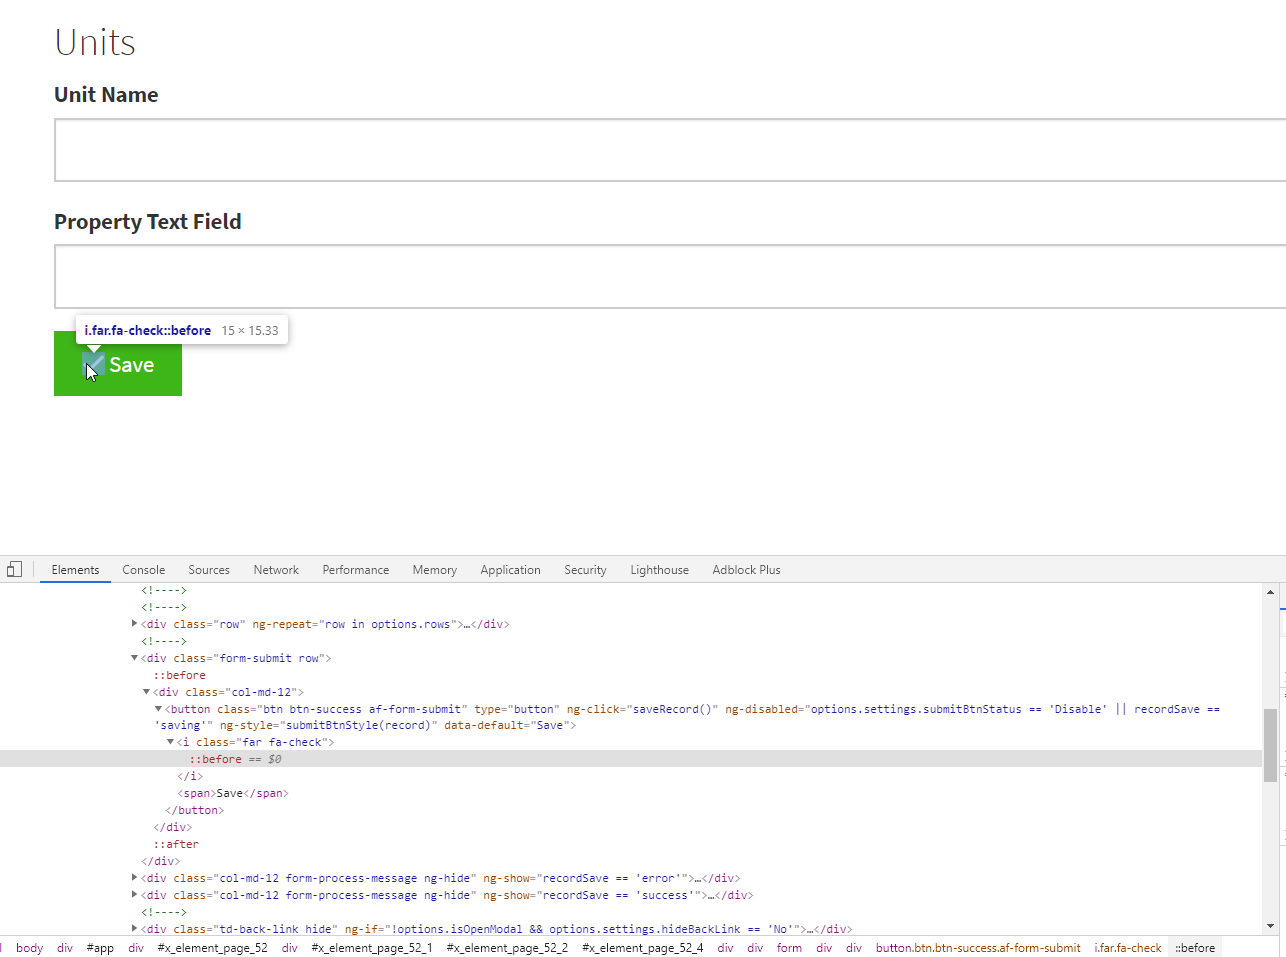
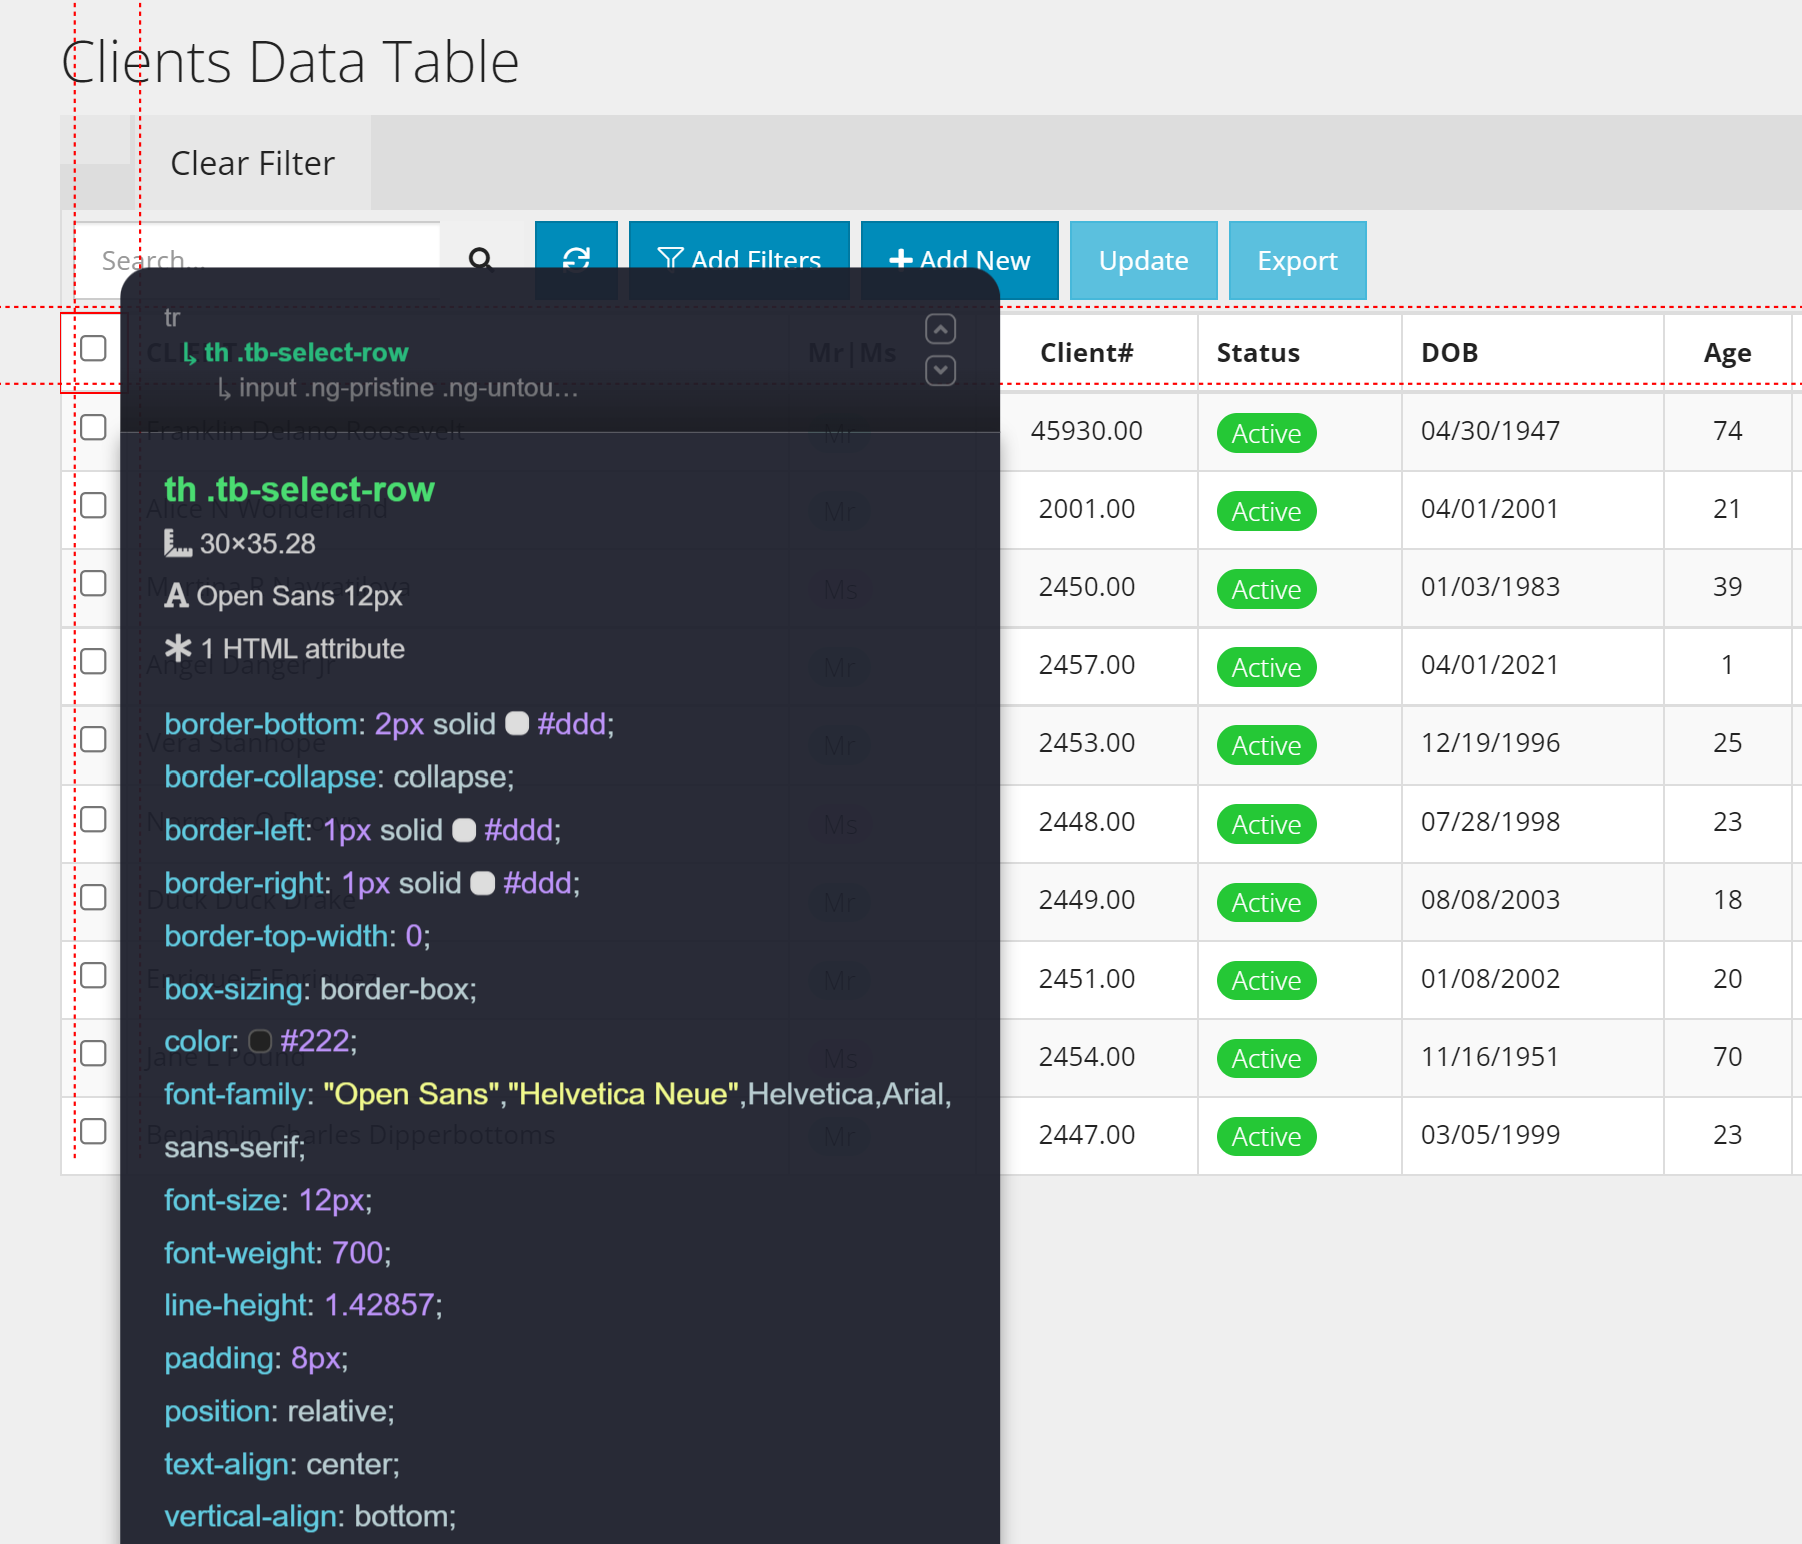
Screenshot showing me trying to locate the right selector using CSSScan, but I’ve tried doing it “manually” using the method Moe describes in the OP. I sometimes get different results for the selector. Again: What I’d like to do is get rid of those lines between all the columns in the table. Want to keep the horizontal lines separating rows. Any suggestions?

1 Like

Hey @WilliamPorter

Here’s a long rambling video for you that may help :laughing:

As mentioned in the video, here’s some CSS to do what you’re looking for

.t-datatable table>tbody>tr {
    border-top: 1px solid #EBEDF3;
}
.t-datatable table,
.t-datatable table>thead>tr>th,
.t-datatable table>tbody>tr>th,
.t-datatable table>tfoot>tr>th,
.t-datatable table>thead>tr>td,
.t-datatable table>tbody>tr>td,
.t-datatable table>tfoot>tr>td {
    border: none;
}

AND some more CSS to play with and explore…

/* table style two  */
.t-datatable h3 {
    color: #181C32;
    font-weight: 400;
    padding-left: 7px;
    padding-bottom: 10px;
    margin: 0;
}

.t-datatable .table-wrap>.table tr {
    color: #3F4254;
    background-color: #fff;
}

.t-datatable table>tbody>tr {
    border-top: 1px solid #EBEDF3;
}

.t-datatable table,
.t-datatable table>thead>tr>th,
.t-datatable table>tbody>tr>th,
.t-datatable table>tfoot>tr>th,
.t-datatable table>thead>tr>td,
.t-datatable table>tbody>tr>td,
.t-datatable table>tfoot>tr>td {
    border: none;
    padding-top: 1.5rem;
    padding-bottom: 1.5rem;

}

.t-datatable {
    padding: 4rem;
    background: #F2F3F7;
}

.t-datatable table>tbody>tr>td {
    color: #3F4254;
    font-weight: 600;
}

.t-datatable .table-responsive {
    /*border: 1px solid;*/
    border-radius: 1rem;
    background-color: white;
    padding: 1rem;
}

.t-datatable a.td-link.td-data-link {
    background: #f3f6f9;
    padding: 8px;
    border-radius: 0.4rem;
}

.t-datatable table>thead>tr>th {
    font-weight: 600;
    color: #B5B5C3 !important;
    font-size: 13px;
    text-transform: uppercase;
    letter-spacing: 2px;
    vertical-align: middle;
}

.t-datatable .td-data-link i.fa {
    color: #3699FF;
}

.t-datatable .td-data-link:hover {
    background: #3699FF !important;
    color: #fff;
}

.t-datatable .td-data-link:hover i {
    color: white;
}

.t-datatable table a:not(.btn) {
    text-decoration: none;
}

.t-datatable .table-actions {
    border: none;
    background: none;
}

/* Check box css */
.t-datatable input[type='checkbox'] {
    margin-top: -30px;
}

.t-datatable input[type='checkbox'] {
    -webkit-font-smoothing: antialiased;
    text-rendering: optimizeSpeed;
    width: 24px;
    height: 24px;
    margin: 0;
    margin-right: 1px;
    display: block;
    float: left;
    position: relative;
    cursor: pointer;
}

.t-datatable input[type='checkbox']:after {
    content: "";
    vertical-align: middle;
    text-align: center;
    line-height: 24px;
    position: absolute;
    cursor: pointer;
    height: 24px;
    width: 24px;
    left: 0;
    top: 0;
    font-size: 12px;

    -moz-box-shadow: inset 0 1px 1px #3699FF, 0 1px 0 #3699FF;

    background: #EBEDF3;
}

.t-datatable input[type='checkbox']:hover:after,
input[type='checkbox']:checked:hover:after {
    background: #EBEDF3;
    content: '\2714';
    color: #fff;
}

.t-datatable input[type='checkbox']:checked:after {
    background: #3699FF;
    content: '\2714';
    color: #fff;
}

/* Search box  */
.t-datatable .input-group input.form-control.input-sm.padder {
    border-top-left-radius: 1rem;
    border-bottom-left-radius: 1rem;
    border-right: none;
}

.t-datatable .input-group-btn {
    border: 1px solid #cccccc;
    background: none;
    border-left: none;
    border-top-right-radius: 1rem;
    border-bottom-right-radius: 1rem;
}

.t-datatable .input-group-btn .btn {
    background: none;
    color: #cccccc;
    padding: 0px 10px;
}

.t-datatable .input-group-btn .btn:focus {
    outline: none;
}

.t-datatable .input-group-btn .btn:active {
    box-shadow: none;
}

and finally here’s a link to the awesome Live CSS tool that I use frequently…

2 Likes

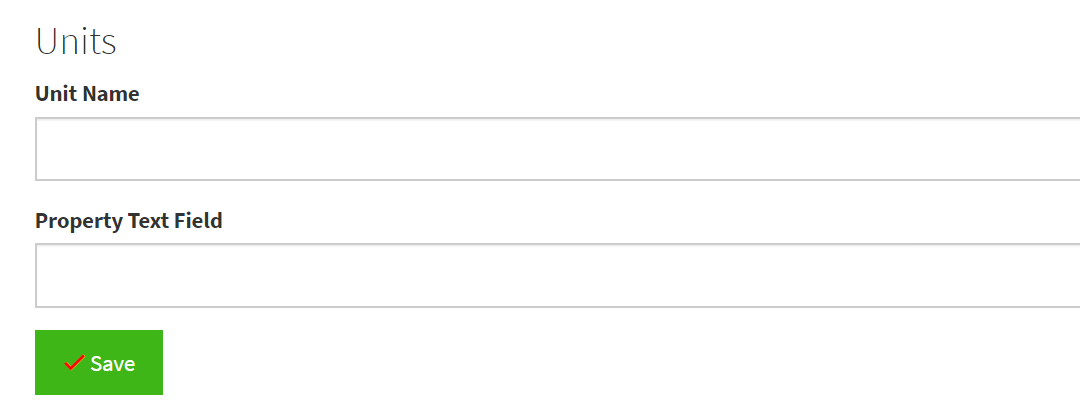
Thanks so much for this, Tim. This managed to do the trick for me: I tried pasting the code you specifically drew my attention to, into the CSS tab for the default layout (which was being used for all my pages) and it got rid of the vertical dividers between columns.

I understand CSS in a general way. Fifteen-twenty years ago I wasn’t half bad with CSS, but I was building websites from scratch. My real problem here was that I couldn’t figure out WHAT elements in Tadabase I could modify and how. So I was pleased and a little surprised when just copying and pasting the code you supplied into the CSS for the default layout worked. But I’ll watch this video now over and over and start learning how to affect other elements of my apps.

THANK YOU for taking the time to do this for me. I expect others will benefit from it too!

William

p.s. Screenshot of my happy result:

3 Likes

Your table looks great!

Happy to help :grinning:

1 Like