This is a possible solution for this suggestion here - https://community.tadabase.io/t/sidebar-and-or-vertical-menu/308
We’re going to implement this - https://materializecss.com/sidenav.html into our app.
First, we need to load the framework into the custom header/footer settings in you app settings. If you’ve seen this tutorial that uses the same framework, we have to approach this differently. We need to use only the sidenav components, rather than the entire CSS library. I’ve already prepared that file, you can find it HERE.
Next, we’re going to host this file within our app. Create a new Data Table with a single file field. Upload the CSS file to that Data Table.

After uploading the CSS file, we need the URL. Click on the CSS file in the Data Table, copy the URL when it opens and paste it somewhere safe for now.
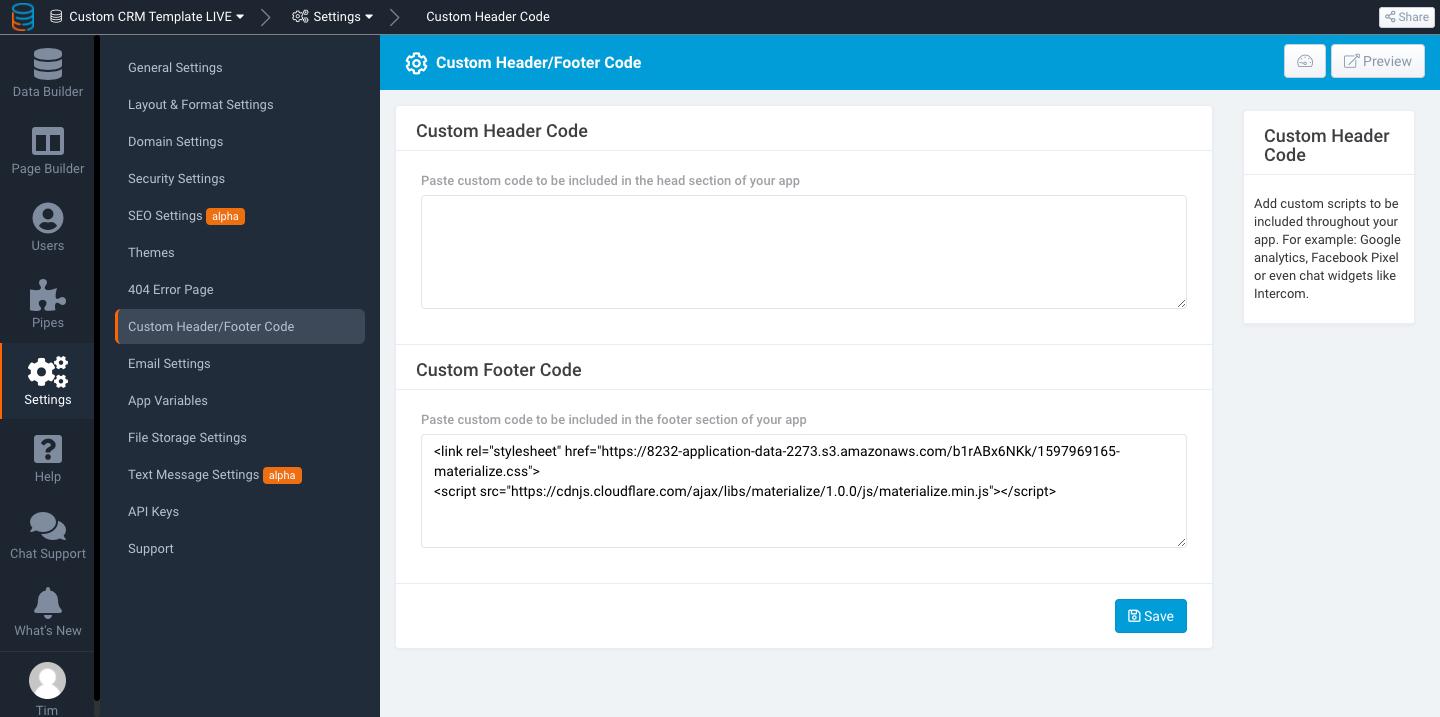
Next, we’re going to go to Settings --> Custom Header/Footer Code and paste the following…
<link rel="stylesheet" href="YOUR_URL_FOR_MATERIALIZE.CSS_HERE">
<script src="https://cdnjs.cloudflare.com/ajax/libs/materialize/1.0.0/js/materialize.min.js"></script>
Remember to replace the URL for the css with your URL.
Now to put the HTML in our app. The way I tested it was to put an HTML component within a layout. This may not be the best approach for you depending on your app structure. I have not tested this outside of a layout.
Here’s the HTML from the Sidenav component…
<ul id="slide-out" class="sidenav">
    <li><div class="user-view">
      <div class="background">
        <img src="images/office.jpg">
      </div>
      <a href="#user"><img class="circle" src="images/yuna.jpg"></a>
      <a href="#name"><span class="white-text name">John Doe</span></a>
      <a href="#email"><span class="white-text email">jdandturk@gmail.com</span></a>
    </div></li>
    <li><a href="#!"><i class="material-icons">cloud</i>First Link With Icon</a></li>
    <li><a href="#!">Second Link</a></li>
    <li><div class="divider"></div></li>
    <li><a class="subheader">Subheader</a></li>
    <li><a class="waves-effect" href="#!">Third Link With Waves</a></li>
  </ul>
  <a href="#" data-target="slide-out" class="sidenav-trigger"><i class="material-icons">menu</i></a>
There’s an important bit to note here
You can’t use {Fields} within the HTML or the component stops working. There might be a way around this but it’s beyond my capabilities.
I simplified the HTML for use in this test. As you can see, every page I want to link to is written as a list item <li></li>. I also grabbed a background image and a menu icon to use.
<ul id="slide-out" class="sidenav">
<li>
<div class="user-view">
<div class="background"><img src="https://lifespringsresources.com/media/catalog/product/cache/1/image/9df78eab33525d08d6e5fb8d27136e95/0/7/077.jpg" /></div>
</div>
</li>
<li>
<div class="divider"> </div>
</li>
<li><a href="https://your_URL">Leads</a></li>
<li><a href="https://your_URL">Jobs</a></li>
<li><a href="https://your_URL">Expenses</a></li>
</ul>
<p><a class="sidenav-trigger" href="#" data-target="slide-out"><img src="https://img.icons8.com/fluent/48/000000/menu--v1.png" /></a></p>
The final thing to do is initialize the JS by adding this to the JS section of your layout.
document.addEventListener('DOMContentLoaded', function() {
    var elems = document.querySelectorAll('.sidenav');
    var instances = M.Sidenav.init(elems, options);
  });

  // Initialize collapsible (uncomment the lines below if you use the dropdown variation)
  // var collapsibleElem = document.querySelector('.collapsible');
  // var collapsibleInstance = M.Collapsible.init(collapsibleElem, options);

  // Or with jQuery

  $(document).ready(function(){
    $('.sidenav').sidenav();
  });
Anyways, that’s pretty much it. I may have glossed over some of it, apologies for that. This is a very crude test and much of this is out of my league. I think the CSS file can be compiled differently. If you look at it, there’s still a lot of unused CSS. There’s also further documentation for the JS of the sidenav, but my JS experience is slim to none. Hopefully people can use this and elaborate on it!